Introduction
This post, I am sharing on how to install Oracle Database 12c in silent installation. I went through lot of Posts and blogs and sharing how to simplify and have smooth database installation. This includes post installation steps where we would have little struggle in create listener.ora and tnsnames.ora and How to create and start pluggable database automatically. This installation is done in Redhat Linux 7.
Installation follows below steps
1. Prerequisites
2. Oracle DB Installation
3. Oracle DB Configuration
4. Listener.ora & tnsnames.ora File setup
1. Prerequisites
Adding IP and Hostname Hosts File
Edit "/etc/hosts" file and add your IP Address and hostname as shown in the example.
<IP-address> <fully-qualified-machine-name> <machine-name>
For example.
$ vi /etc/hosts
127.0.0.1 localhost localhost.localdomain localhost4 localhost4.localdomain410.20.30.40 bose_pc bose_pc Set the correct hostname in the "/etc/hostname" file.
biappOracle Installation Prerequisites
Perform either the Automatic Setup or the Manual Setup to complete the basic prerequisites. The Additional Setup is required for all installations.
Automatic Setup
If you plan to use the "oracle-database-server-12cR2-preinstall" package to perform all your prerequisite setup, issue the following command.
# yum install oracle-database-server-12cR2-preinstall -yIt is probably worth doing a full update as well, but this is not strictly speaking necessary.
# yum update -y
It's worth running the all the YUM commands listed in the manual setup section. Depending on the OS package groups you have selected, some additional packages might also be needed.
Manual Setup
If you have not used the "oracle-database-server-12cR2-preinstall" package to perform all prerequisites, you will need to manually perform the following setup tasks.
Add the following lines to the "/etc/sysctl.conf" file, or in a file called "/etc/sysctl.d/98-oracle.conf".
fs.file-max = 6815744kernel.sem = 250 32000 100 128kernel.shmmni = 4096kernel.shmall = 1073741824kernel.shmmax = 4398046511104kernel.panic_on_oops = 1net.core.rmem_default = 262144net.core.rmem_max = 4194304net.core.wmem_default = 262144net.core.wmem_max = 1048576net.ipv4.conf.all.rp_filter = 2net.ipv4.conf.default.rp_filter = 2fs.aio-max-nr = 1048576net.ipv4.ip_local_port_range = 9000 65500
Run one of the following commands to change the current kernel parameters, depending on which file you edited.
/sbin/sysctl -p# Or/sbin/sysctl -p /etc/sysctl.d/98-oracle.confAdd the following lines to a file called "/etc/security/limits.d/oracle-database-server-12cR2-preinstall.conf" file.
oracle soft nofile 1024oracle hard nofile 65536oracle soft nproc 16384oracle hard nproc 16384oracle soft stack 10240oracle hard stack 32768oracle hard memlock 134217728oracle soft memlock 134217728
For RHEL OL6 or OL7
# OL6 and OL7 (RHEL6 and RHEL7)yum install binutils -yyum install compat-libcap1 -yyum install compat-libstdc++-33 -yyum install compat-libstdc++-33.i686 -yyum install glibc -yyum install glibc.i686 -yyum install glibc-devel -yyum install glibc-devel.i686 -yyum install ksh -yyum install libaio -yyum install libaio.i686 -yyum install libaio-devel -yyum install libaio-devel.i686 -yyum install libX11 -yyum install libX11.i686 -yyum install libXau -yyum install libXau.i686 -yyum install libXi -yyum install libXi.i686 -yyum install libXtst -yyum install libXtst.i686 -yyum install libgcc -yyum install libgcc.i686 -yyum install libstdc++ -yyum install libstdc++.i686 -yyum install libstdc++-devel -yyum install libstdc++-devel.i686 -yyum install libxcb -yyum install libxcb.i686 -yyum install make -yyum install nfs-utils -yyum install net-tools -yyum install smartmontools -yyum install sysstat -yyum install unixODBC -yyum install unixODBC-devel -y # Required for 12.1, not listed for 12.2yum install gcc -yyum install gcc-c++ -yyum install libXext -yyum install libXext.i686 -yyum install zlib-devel -yyum install zlib-devel.i686 -y # OL6 only (RHEL6 only)yum install e2fsprogs -yyum install e2fsprogs-libs -yyum install libs -yyum install libxcb.i686 -yyum install libxcb -yCreate the new groups and users.
groupadd -g 54321 oinstallgroupadd -g 54322 dbagroupadd -g 54323 oper#groupadd -g 54324 backupdba#groupadd -g 54325 dgdba#groupadd -g 54326 kmdba#groupadd -g 54327 asmdba#groupadd -g 54328 asmoper#groupadd -g 54329 asmadmin#groupadd -g 54330 racdba useradd -u 54321 -g oinstall -G dba,oper oracleUncomment the extra groups you require.
Additional Setup
The following steps must be performed, whether you did the manual or automatic setup.
Set the password for the "oracle" user.
passwd oracleSet secure Linux to permissive by editing the "/etc/selinux/config" file, making sure the SELINUX flag is set as follows.
SELINUX=permissiveOnce the change is complete, restart the server or run the following command.
# setenforce PermissiveIf you have the Linux firewall enabled, you will need to disable or configure it, as shown here or here. To disable it, do the following.
# systemctl stop firewalld# systemctl disable firewalldIf you are not using Oracle Linux and UEK, you will need to manually disable transparent huge pages.
Create the directories in which the Oracle software will be installed.
mkdir -p /app/oracle/product/12.1.0.2/dbhome_1chown -R oracle:oinstall /u01chmod -R 775 /u01
Putting mount points directly under root without mounting separate disks to them is typically a bad idea. It's done here for simplicity, but for a real installation "/" storage should be reserved for the OS.
Unless you are working from the console, or using SSH tunneling, login as root and issue the following command.
xhost +bose_pcDownload Oracle Database12.1.0.2 and unzip the software in server and start the installation with the following command in putty or terminal.
Just click this link to get db_install.rsp file details. copy the content and save as db_install.rsp and move to your intallation directory
$ cd /u01/stage/softwares/database/database
$ ./runInstaller -ignoreSysPrereqs -ignorePrereq -showProgress -silent -responseFile /u01/stage/softwares/database/database/response/db_install.rsp INVENTORY_LOCATION=/u01/app/oraInventory ORACLE_HOME=/u01/app/oracle/product/12.1.0.2/dbhome_1 ORACLE_BASE=/u01/app/oracle

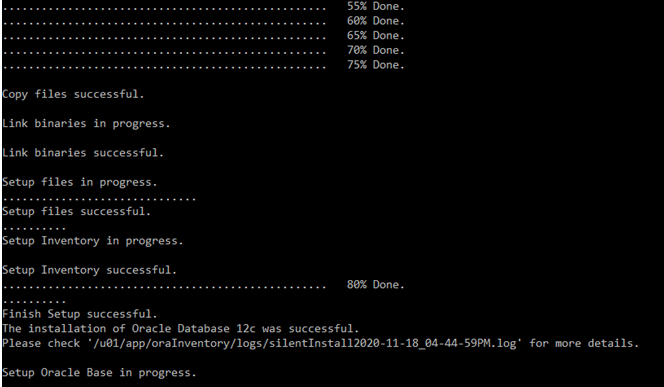
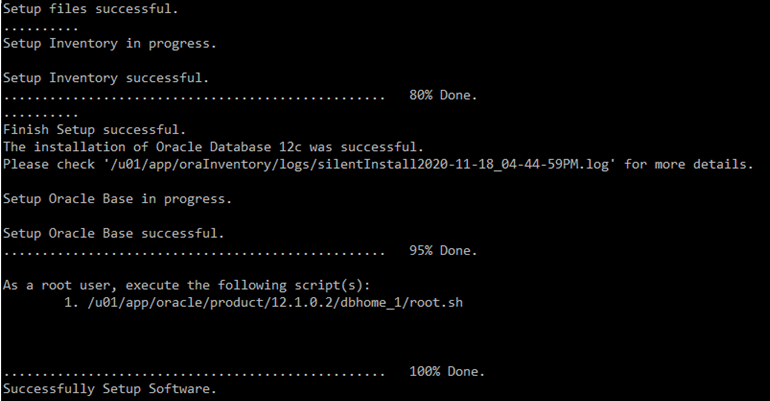
It will start the installation and will send successfully without configuring the DB.
As shown in the screenshot, Login as root user and run root.sh file.
$ cd /u01/app/oracle/product/12.1.0.2/dbhome_1/bin
$ dbca -silent -createDatabase -responseFile /u01/stage/softwares/database/database/response/dbca.rsp


create tnsnames.ora and listener.ora file in the following directory. /u01/app/oracle/product/12.1.0.2/dbhome_1/network/admin/
|
tnsnames.ora |
ORCL = (DESCRIPTION = (ADDRESS = (PROTOCOL = TCP)(HOST = bose-pc)(PORT = 1521)) (CONNECT_DATA = (SERVER = DEDICATED) (INSTANCE_NAME=ORCL) (SERVICE_NAME = ORCL) ) )PDBDB = (DESCRIPTION = (ADDRESS = (PROTOCOL = TCP)(HOST = bose-pc)(PORT = 1521)) (CONNECT_DATA = (SERVER = DEDICATED) (SERVICE_NAME = PDBDB) )) |
|
listener.ora |
ORCL =(DESCRIPTION_LIST = (DESCRIPTION = (ADDRESS = (PROTOCOL = TCP)(HOST = biapp)(PORT = 1521)) )) SID_LIST_LISTENER = (SID_LIST = (SID_DESC = (GLOBAL_DBNAME = BIAPPDB) (SID_NAME = ORCL) (ORACLE_HOME = /u01/app/oracle/product/12.1.0.2/dbhome_1) )) |
Happy Blogging!
Bose

No comments:
Post a Comment